Showing posts with label Martha Factor. Show all posts

Tuesday, November 5, 2013

Check me out, it is FALL and I rock

Apples, before I brutally slaughtered them into
a delicious dessert.
Have you ever heard of apple butter?  I sure hadn't.  Prior to the Beans destroying all that is good about dessert by developing allergies to the worlds greatest food combo -- peanut butter and chocolate -- I had no reason to branch out.  Then he ruined everything and I had all but given up on anything good, sweet and fattening.  Oddly enough I wasn't loosing any weight, a fact I can't explain and which is entirely off topic ...

But, then came apple butter.

Its like applesauce, but not at all good for you and way creamier.

My parents wound up buying a place with a ton of apple trees, so we needed to use them ... my kitchen (and waistline) will never be the same.

In the interest of complete transparency -- it is time consuming and messy as heck, but it is easy.  Slap on a good podcast, movie, or some music and go to town!

You can search Pintercrack for much more thorough or serious sounding recipes.  Or you can hang out here.
 
Me picking the apples.
I should have Linda Hamilton Terminator arms by now.
I started by mixing cheap wine and Sprite.  No, seriously.  It doesn't actually go into the apple butter, but I find that it makes the process more enjoyable.  Why mix?  Because I will be singing show tunes before the apples are even halfway done if I drink the cheap wine straight.  I am not much of a sipper, more of a gulper.

So I mixed my Mommy Juice, snapped my iPod in because I could hear Handy (with his whiny assed tools) Manny in the background still.  And got to work.

My apples are small, and the skin is really thin so I don't peal them.  If you are getting store bought apples you may need to peel them and won't need as many because they are probably bigger.  Don't get horribly hung up on what kind of apples to use because by the time you are done cooking them with all the spices they will all be delicious.  Just know that if you want tang, pick a tangier apple, tart or sweet same deal.

For this round of apple butter I am using ... well, I am not entirely sure what kind of apples they are.  Here is a visual of the four main "types" but I think one and four may be the same kind:


I have googled them and come up with a couple different names, but I would love to hear what you think they are.

Now to the actual instructions.  Brace yourself for my thorough, foodie level instruction giving skillz:

Step one: Wash the bird shit and bug shit off.  Seriously, why they gotta poo on my food?


Step Two: Core and slice the muthahs.  And since my apple core-er sucks, I do this with a knife.


*insert possible brief intermission for ER visit here*

Step Three: Re-fill your drink, undoubtedly it is time.  Then toss the slices of apples into your food processor.  Process until they are in small chunks, smaller they are the faster they cook.


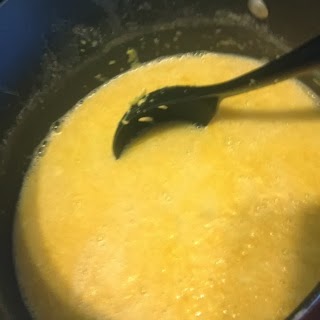
Step Four: Dump the chunky, wet apple matter into the CrockPot.


Blurry pictures happen when someone's hands are slippery.

Step Five: Spices.  Don't ask me to measure, I don't really do that and I am already a full drink in (my cup is 32 oz) by this point so my already low standards are dipping.  I eyeball it.  If I had to guess, for a full pot I use at least a full cup of brown sugar and then coat the top of the apples with cinnamon and allspice (so like 2 to 3 teaspoons each).  Here, I offer pictures to those of you who know what you are doing ...


It is a lot more spices than I have ever seen in another recipe, but to be honest I have never heard anyone complain LOL

Step Six: Set your Crock Pot on long and low.  For mine this is the 8 hour setting.  I try to do this as early in the morning as possible because you really do want the apples cooking for 8 to ten hours.  It makes for creamier apple butter in the end.


Step Seven: Try to not eat it through out the day and feel very Martha Stewart-ey because your house smells like fall and you seem to know what you are doing.  Stir occasionally, but really, you don't want to do much.


Step Eight: When the apples are plenty squishy, start shoveling them into a blender, food processor, or be uber fancy and have an immersion blender.  I know it is a huge surprise, but I am not uber fancy and lack an immersion blender.  I blend this bad boy until it gets creamy.


Once we have blended the snot out of the apples, we are technically done.  You can eat it straight, mix it in something, jar it, or even ice cube it like this:


I do that because then the Meatball can drop an apple cube in his oatmeal and it both flavors AND cools it.

I know, you are in awe of my general bad ass glory here, aren't you?

Anyway, it does freeze well, so jar it up and store it for later so you can have apple butter year round.  One full CrockPot made 6 full pint jars.


In a few weeks I will be cute-i-fying the jars somehow in order to give them away, so I will share that later.

Cheers!

Saturday, September 28, 2013

So, laundry detergent, eh?

I was on a roll, I was feeling good, I knew failure was imminent!

But not today, or so I told myself!

As I was busily making my Ghetto Wipes and cleaning fluid I was also chatting with friends on the interwebz doing serious research.  In a facebook group of totally awesome people, many of whom far more skilled than I clearly, a recipe for laundry detergent surfaced.  The idea was born and I was obsessed.

I compared notes with about a million other recipes on Pintercrack.  I wanted a liquid and not a powder, and wound up doing one similar to this.  It is apparently the Duggar's recipe, but mine had slightly different ratios and made less than this one but I am not complaining.  Since it was a recipe shared by someone who makes this to sell it, I am not sharing the exact thing here -- not like I have such huge traffic it would matter but not risking it anyhoo!

So the ingredients are simple ... water, Fels-Naptha soap (or any bar soap apparently), Borax, and Washing Soda.  I made a quick Walmart run for the bar soap, the bucket (cheaper BTW at Home Depot or Lowes, NOT at Wally World go figure), and the washing soda.

Start by grating the bar of soap with a cheese grater.  Try to not be totally appalled at how much it looks like cheese.


Boil 4 cups of water and add the washing soda and borax to it (see, different steps than the Duggar one!) and once it is mixed around a bit add the cheesy soap bits.  I was trying to be really patient and get it to dissolve, but it was only mostly dissolved by the time I gave up and moved on.


I filled my big assed expensive bucket (it was like $5 instead of $3 at the hardware store LOL) with about 3.5 gallons of water by using an empty and rinsed out apple juice bottle.


While doing this step the Beans mocked my superior parenting skills by breaking into a room with a baby proof knob cover that *I* can barely use but he can remove.  Threw it into the bucket of water for good measure to let me know what he really thinks of my attempts to keep him out of my bedroom.


I then dumped that yellowish mixture into the bucket, clapped the lid on and let it sit for 24 hours.


The next day a hard film about a quarter inch thick had formed on the top and I tried to break it up.


Then the messy began.

I had an empty giant Costco-brand-of-Tide bottle and a couple big containers from the dollar store.  No matter how careful I was about it, I wound up smelling very very clean by the time I was done.


End result, we have been using it for a bit and I love it!  I use a full cup that came with the "Tide" of it for a wash load, because I read that somewhere... now that I think about it I may try less and see how that works.


What I Have will last a while.  I do have to occasionally shake the bottle because the chunks settle into the bottom and pug the sucker up.

So while I am not giving you a full how-to here, this should serve as a lesson.  I appear to not have caused any permanent damage to anything and am still off of all the government big brother watch lists (that I know of or wouldn't be on already LOL) ... so you can totally do this too!

So no massive failure yet ... the streak continues and I am not sure what I will do next!

Thursday, September 26, 2013

Ghetto Wipes

So immediately following the making of my Ghetto All Purpose Cleaner I started butchering a roll of paper towels to make wipes because it appeals greatly to my inner lazy biotch to just have that around.

But let us start at the beginning.

I am a teaching supply hoarder.  Whether it is Sharpies or random containers that I insist on keeping while my husband rolls his eyes and tells me I am nuts, I just cannot help myself.  It is a compulsion.  One that behooves us more than my husband will EVER admit.

Point is, every time he goes through the garage and asks me "can I please throw this out now?!" I find a use for something that saves us money.

So the cylindrical cleaning wipes containers I insisted on keeping because YOU NEVER KNOW wound up being not only insanely useful but also part of saving us money!  Take that Bunyan!

I had my Ghetto All Purpose Cleaner ready to go, so I just needed the container and the "wipes."

This is where it gets messy.

First off, I had a roll of paper towels that are select a size, and I really thought I would like that.  I was wrong.  I may be getting ahead of myself here in reviewing my "product" before I tell ya how to make it, but in case you don't read the whole thing and try to walk in my footsteps (are you mad?) let me tell you now -- your wipes will be tiny!  Do not use the select a size towels if you use a dispenser like I am unless you want tiny wipes.  How tiny you ask?  Let me show you:


So I would prefer, and will do this next time because it is the only complaint I have at present, to use the full sized towels.

Reason being, step one with the paper towels is to cut them in half.  The whole damn roll.  Have you ever tried to cut a roll of paper towels in half?

It is a messy process.

Really.


I couldn't fit a whole roll of paper towels in the containers because they are just a bit too narrow, so I had to set some aside.  I did have the sense to do that before I cut the roll in half at least.

After sawing the roll in half and making your work space look like a blizzard hit, you have to wiggle the cardboard roll out of the center.  This is a lot easier than I figured it would be.  Then squeeze the roll into the container and pour the fluid mixture on it.


Seriously, that simple.

Now I had to clean the front bathroom, the one the boys all use.  I did not take a before picture, frankly who wants to see that?  But the after picture?  Seriously, my toilet was sparkling like a moody vampire on a sunny day!


Did you "ooooo" and "aaaaaa" because you should.

Again, like I said in the last post about making the cleaner, it was not like I was scrubbing obsessively.  It was no more work than a usual cleaner.  I did have to wipe the space dry, so I had one hand with a wet wipe and one with a dry one.  I also can't do a cost break down because again I had to purchase none of this that day, but I am sure it comes out exceptionally cheap when you really figure it out.


Feeling pretty in control of things I set my sites on a bigger battle because something else was running low and I would need to buy more soon ... laundry detergent ... oh yeah.  Stay tuned.

I am on a roll here, maybe I should change the blog up to be about practical cleaning tips ... something like ...


Seems legit.

Wednesday, September 25, 2013

All Purpose Cleaner, ghetto style!

I love the idea of making my own stuff.

Okay, no, I don't.  But I almost got that lie out with a straight face.  I am just cheap and being that we are a one income family in a world where two incomes is advisable we are broke enough I consider it.

While cleaning products aren't something I have to constantly buy (I usually did the bulk purchase option which lasted a bit) it seemed like they coordinated when to run out so that it would really bankrupt us.

Toilet Bowl Cleaner: "Hey y'all, the stash is getting low out here.  We only have one spare bottle that she will open the next time she cleans!"

Glass cleaner Refill: "Dats good with me, I am almost out too!  I will make sure she spills on the next refill and she will have to replace us at the same time!"

Antibacterial Surface Wipes: "No worries here!  Kids are back in school and you know she will be disinfecting the poo out of them daily!  Ha ha she will have to replace all of us!"

Meanwhile the toilet paper and paper towels are chiming in that we are down to the last roll too.

So the bulk that can be so great stinks when you have to replace three things at 20ish dollars whenever it happens.

So, I again hang my head and turn to the Pintercrack gods and ask if they have something that won't kill me, burn the house down, or land me on some government watch list if I make it in my kitchen.

I started with something that was an all purpose cleaner.  I went with that because my beloved wipes were running low, and in order to MAKE new ones I needed to MAKE the fluid first.

So I looked and looked ... for something supposedly so simple why are there so many options?  Oh and why does vinegar have to work so well for cleaning and smell like vinegar?  I mean really, isn't there a way to not make it smell like athlete's foot in the midst of the throes of death?  After the microwave incident it seems unlikely I will intentionally make my house smell that way, right?

Anyway, I went with this pin, because it did seem simple.

1/2 tsp baking soda
1 tsp dish soap (everyone uses Dawn LOL)
2 tbsp white vinegar
2 cups warm water

Aaaaand apparently I took no pictures during the whole making-it process.

Great.  Well I will tell you that I used the Dawn with Olay in it so it smelled like pomegranate something or other.  This one:


While that may leave a film behind when you clean (since it IS a lotion in the soap) it made the smell of vinegar much less overwhelming and it was the only Dawn I had in the house left over from a homemade scrub making session.

I followed her directions, which are nice and simple and I heart that, and wound up making several batches.

Here are my bottles of completed All Purpose Ghetto Cleaner (yes, a classy and creative name really sells the product) ...


Stunning, I know.  Yes, that is an empty Squirt bottle re-purposed for a life of holding the back up refills.  I made a ton of this stuff, mostly because I had the supplies and it was easy.  I found that with the Dawn I used that the vinegar smell was actually very tolerable, so I was stoked to use it.

I did use the spray to clean somethings and oh em gee it was a fantastic cleaner!  Like seriously, I was genuinely impressed.  I honestly thought when people raved about their homemade cleaners it was just them patting themselves on the back for having made it and scrubbing their asses off in order to fool themselves into thinking they worked.  Sorta like the whole microwave thing, I figured my new exercise plan would be that all my home cleaners sucked and I had to work four times as hard to make the house passably clean.  Not so!  I was actually impressed at how clean stuff looked.  I do have to follow up my wet wiping with a dry wipe, probably because I used the Dawn with Olay and it streaks if I don't.  But it smells pretty decent, cleans well, and costs very very little.

Usually in posts like this people tell you that it only cost them $0.08 a bottle or something, honestly I have no clue.  I do know that I had all the ingredients, including the empty 2 liter bottle and dollar store spray bottle, so technically it cost me nothing to make it that day.  Having had this in the house for over a week I can tell you that I use it pretty often but I am not running out yet, so it is certainly economical.

So, I didn't blow anything up and didn't even make a big mess this time!  Well, at least I didn't until I started to make the wipes ... but that is tomorrow's story ...

Wednesday, December 19, 2012

mod podge, hair "gel," and cheapo x-mas gifts

Sometimes even I can be amazed at my own ability to be overly confident.  For Christmas this year I decided that somehow I was capable of not only being crafty, but sewing.  I don't know what the hell I was thinking with the sewing part, but that is a separate post that I will probably drink my way through writing ... and sewing, I think it may improve my odds.

This post?  Well I thought this would be easy, after all I have done this stuff before.

Remember my easy yet cheap gift for my mother?  This one?


Yeah, all of two ingredients, Dawn dish soap and sugar, and you have a pretty scrub.  I foolishly signed on to make about a million of them for a baby shower  which was adorable by the way.  Here is a picture of the blue version since the mama-to-be was baking a baby boy in her oven:


So by the time December rolls around I am like a scrub-making-bad-ass.  Done it a few times, can't possibly screw it up.  Right? HA!

I made the scrub without a problem, because honestly it is that easy.  But then I looked at that jar and I thought to myself "Self, I don't have any more cute spoons.  I need a pretty label!"  So I sat down and I made these.

So far so good, ultimately.  I am not a thousand percent pleased with the label but I needed to glue those babies on and get my jars drying because some of my presents were getting mailed and I needed to get on that.  So out comes the Mod Podge and in comes all those opportunities to screw stuff up.

How to Eff Up EASY Christmas Gifts in Twelve Simple Steps:

Step One: Gather your supplies.  This should be easy, make your scrub following the directions found here, and pour into the jars of your choice.


Then grab Mod Podge, and something to paint it on with.  Side note: If you are going to use a really cheap brush you happen to have and intend to just throw away when you are done please note the odd pricking sense of foreboding you have because the brush is about to be your downfall.


Step Two: Nearly rip all the skin on your hands off trying to open the murther fracking Mod Podge that has sealed itself within the bottle.

Step Three: Put some Mod Podge on the top of the jar.


Step Four: Put one of your labels on top of the Mod Podge.


Step Five: Start putting Mod Podge on top of the label.  This is when shit starts going wrong.

Step Six: Realize that the ink from your printer is smearing and you need to use fewer brush strokes.


Step Seven: Realize that your cheap assed brush is shedding hairs into your pretty Mod Podged labels.  Try to pick it out and swear at it without smearing additional ink around.


Step Eight: Run your hands through your hair in frustration and realize you just Mod Podged your hair into a pony tail.  There is no picture accompanying this damn step.

Step Nine: Realize that you might have just Mod Podged the goshdamn lids and/or rings on to the jars and remove/wipe as necessary.


Step Ten: Add another layer of Mod Podge while still picking out hairs from the brush and feeling your own hair solidify.

Step Eleven: DO NOT TOUCH THEM.  Just leave them alone, you have done enough damage, let them dry.


Step Twelve: Remember to put a hat on before answering the door for the FedEx guy because you haven't had time to take a shower so you still look suspiciously like a scene from Something About Mary.


So with all this success rolling around the house I decided today is not the day to attempt sewing, something I cannot do well at on a good day.  I figure when I need to chisel my hair we can safely assume this is not a "good day."


There is the finished, not wrapped product.  Not quite as cute as I pictured, but at least no one knows what I was aiming for.  Without that mental image to compare it too I think they work just fine.